You have an iPad Pro and Apple Pencil and want to learn how to color in the Procreate app. If you are unfamiliar with any other software before Procreate, this software isn’t too hard to grasp. Even my wife can pick up this easy-to-use application and create art! Let’s start drawing!
In this tutorial, I want to go over some advanced features in the Procreate app and how to use them to color your art! I’ve also provided my favorite brushes to use. After each step, I will let you know which brush I used.
The first step is to sketch out your character. I like sketching in blue color for my underdrawing.
Use the Sketch Brush.
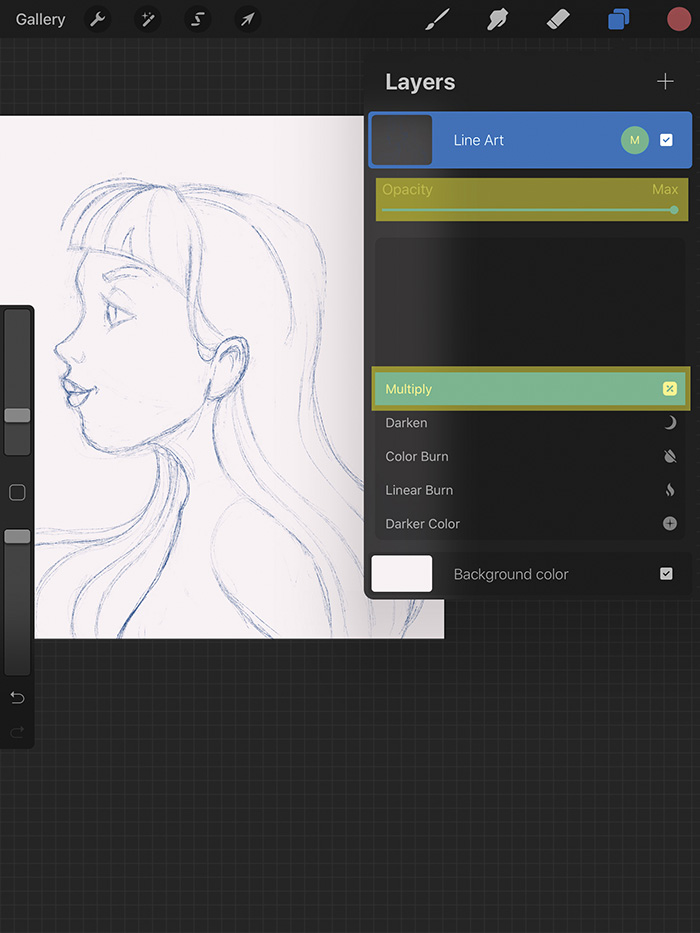
Take your sketch and place this on the top of all your layers. Set this image to “Multiply” and drop the opacity too. 10% to 15% is a good opacity number. The highlighted area in the figure below is where you can find this feature. Once you have this, you can block out your solid colors.
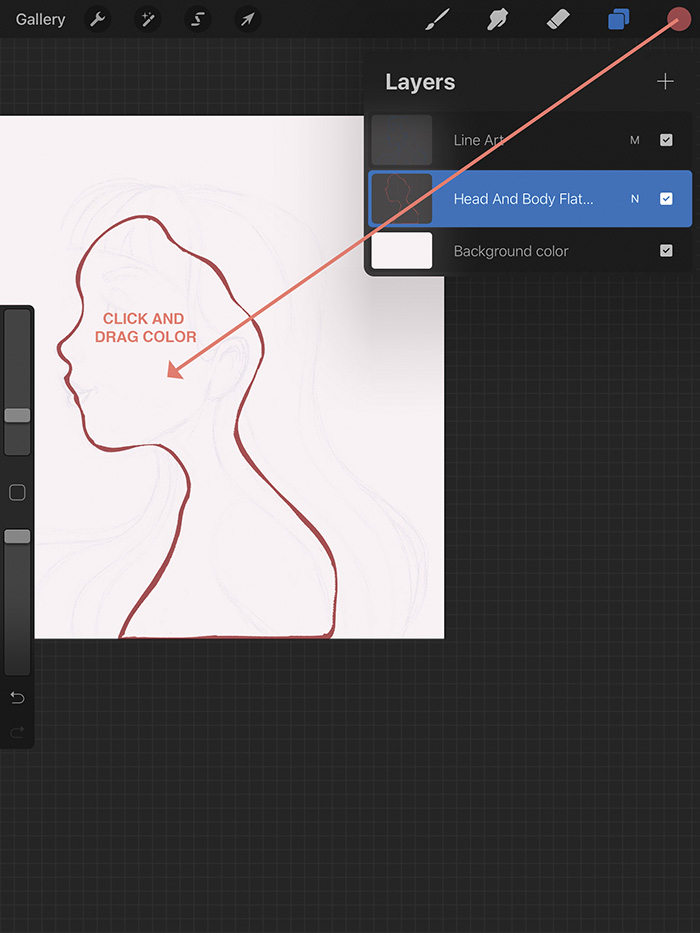
Follow your sketch drawing and fill in your shapes with a solid color. To fill an area, click and drag the swatch color over the desired location. All shape drawings must connect!
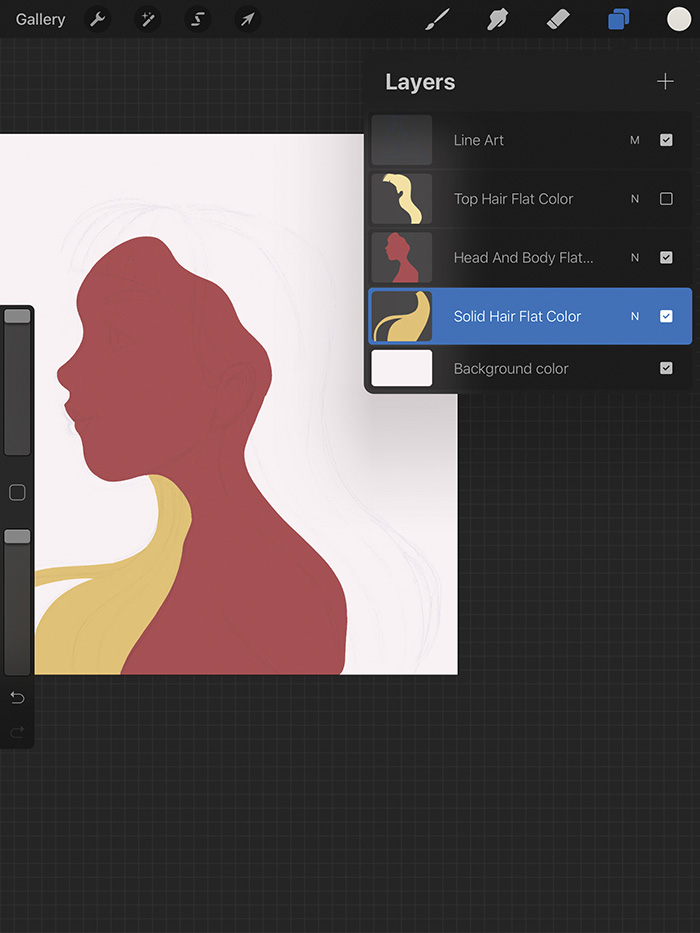
Create multiple solid color layers to break up detail. This method comes in useful when adding details like shading. I like to keep the body, head, and hair separate.
Use the Ink Brush.
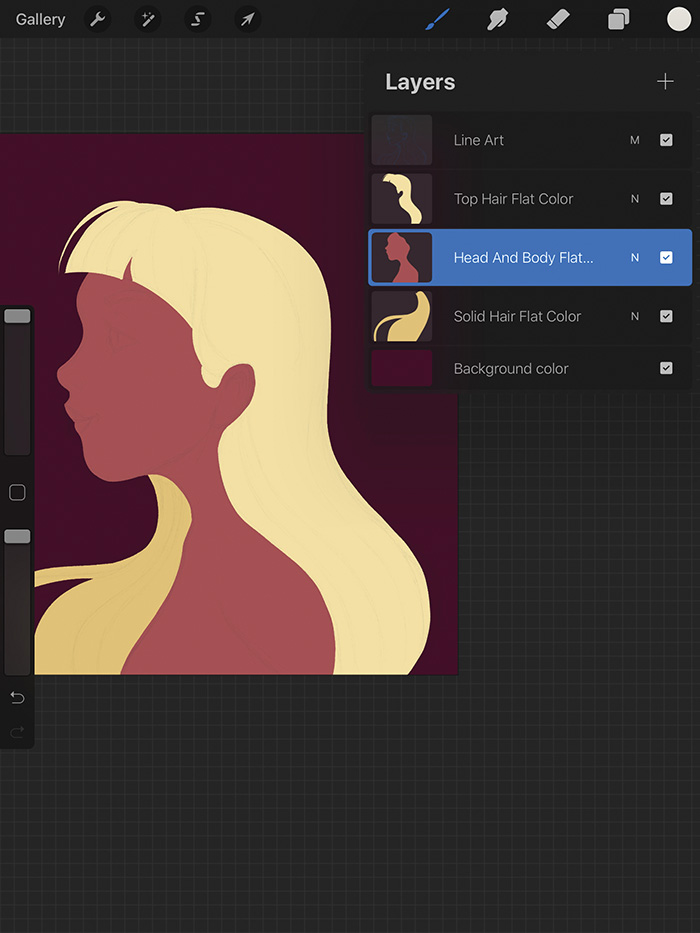
Once all shapes are filled, you can add details in the Procreate app. Draw in the eyes, nose, and overlapping shapes like the chin and neck.
Use the Ink Brush.
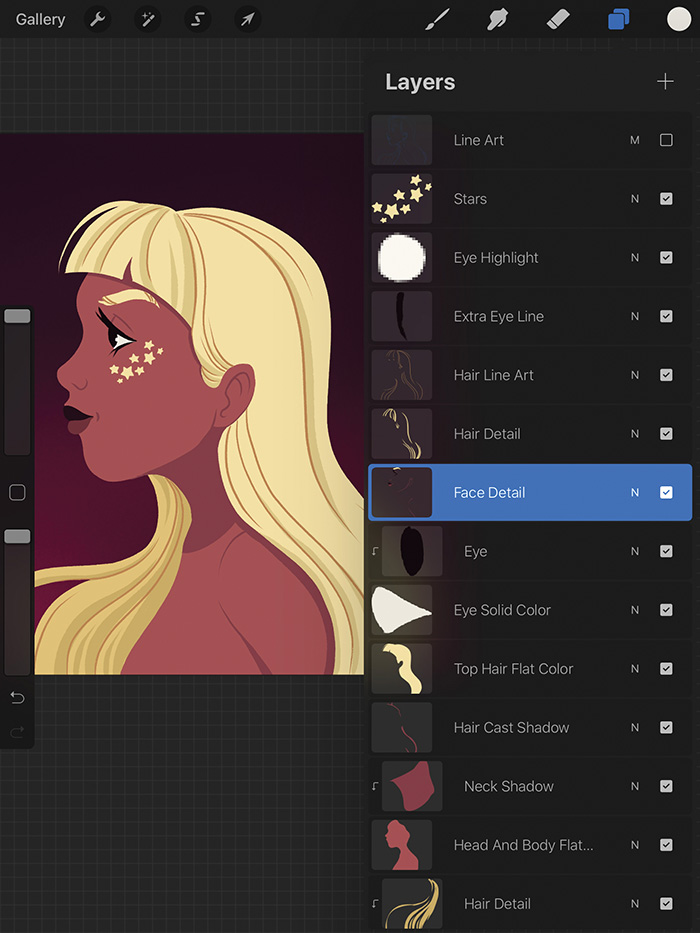
Shadow and light will bring life to your art! Using masks will help you keep your flat colors in the Procreate app. A combination of clipping masks, masks, and selections will help.
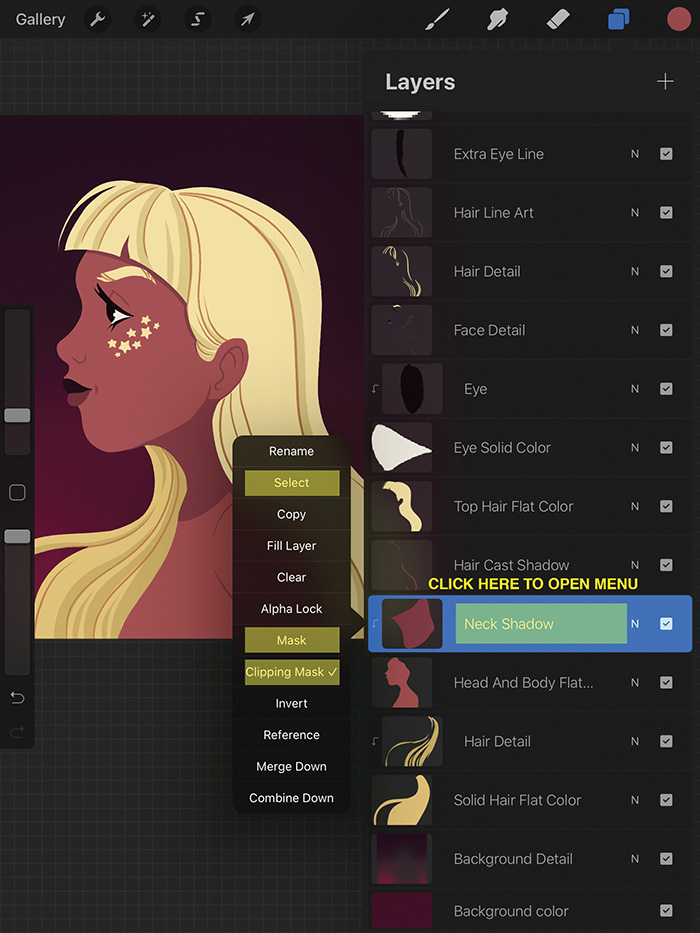
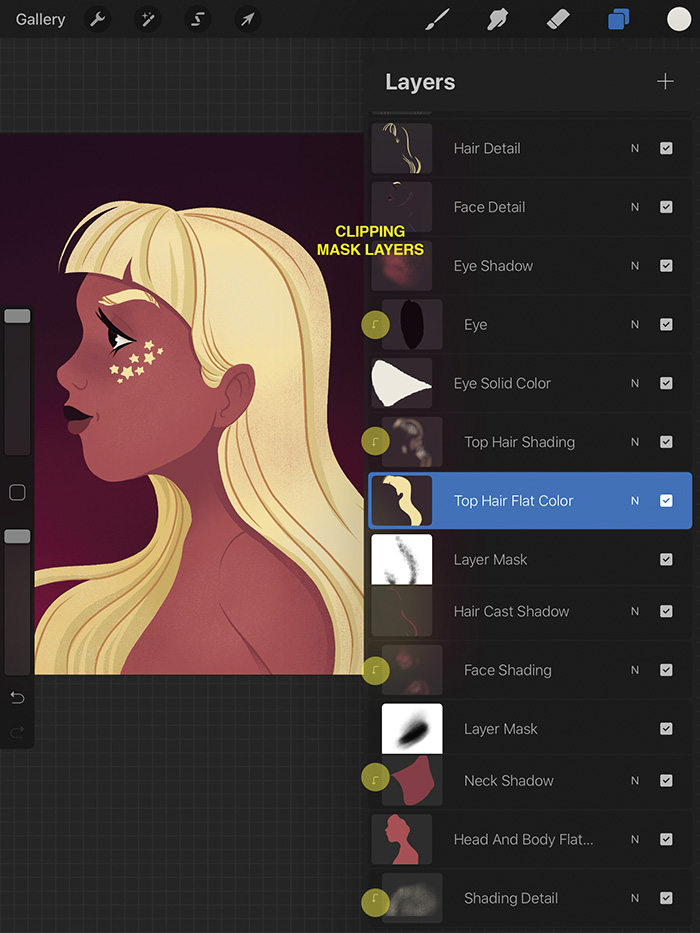
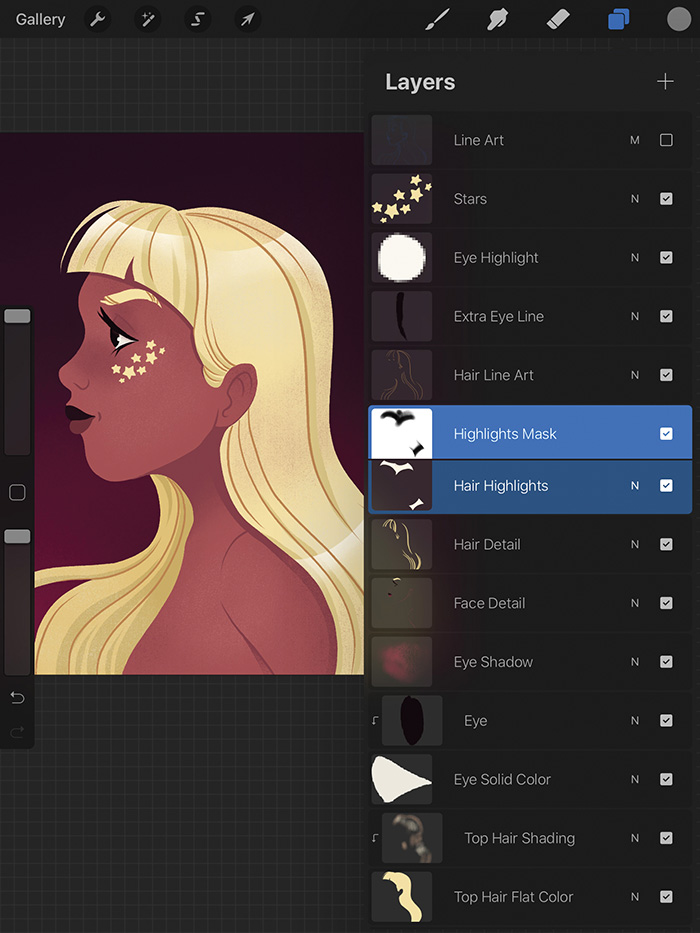
To use the clipping mask feature, make a layer above the flat color you want to stay inbound. Layers with arrows pointing down are clipping masks. Check out the diagram below.
Use a Large Shader Brush.
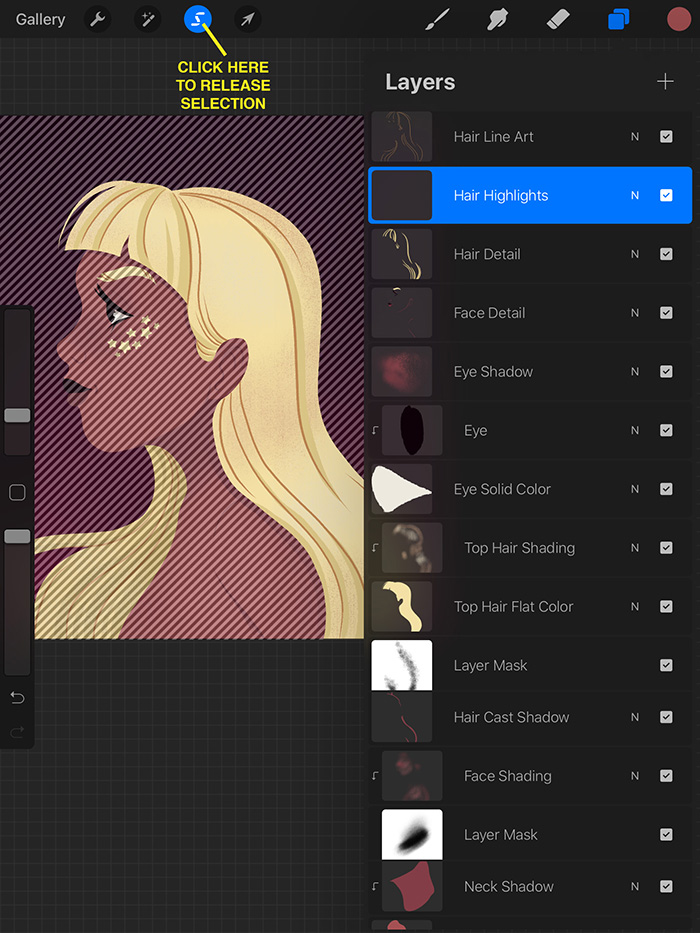
Another color masking feature is the selection function. Select the shape you want to use. Diagonal lines appear when shapes are selected. When this happens, you can draw on the same layer or create a second layer above. Make sure to deactivate your selection when done.
Use Ink Brush.
A helpful technique to add detail is a combination of selections and masks. While the shape is selected, block in detail like hair. View the examples above and below. How to mask your work. Select the layer you want to activate. A white area signifies the masking area.
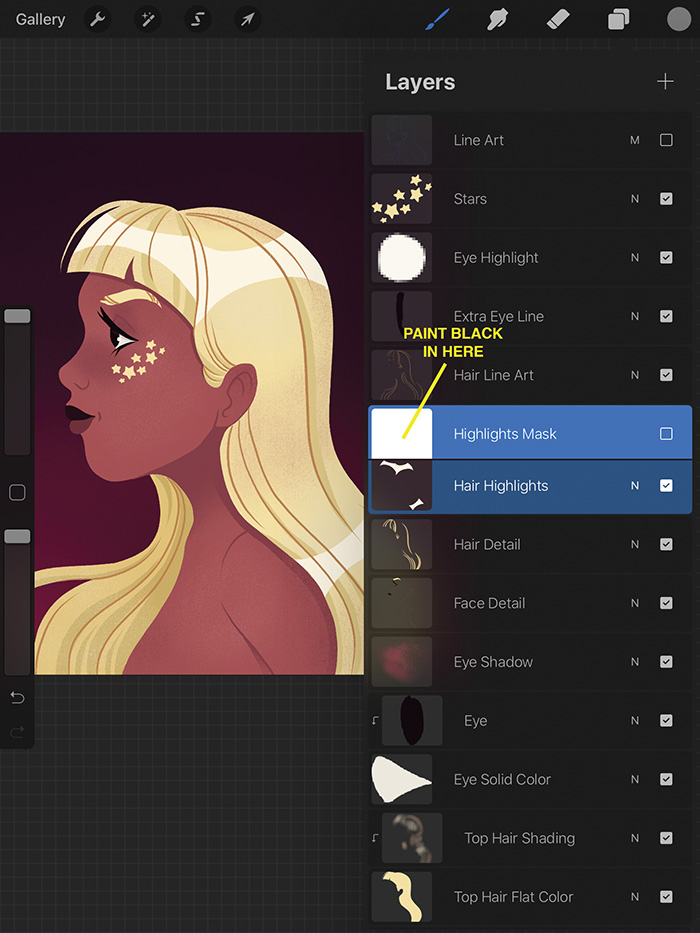
Make sure the white area layer is selected. Paint with black to remove any unwanted detail. Use white to add detail back. This is great for fine-tuning solid colors.
Use an Ink Brush for solid color and a Small Shader Brush to remove the detail masking area.
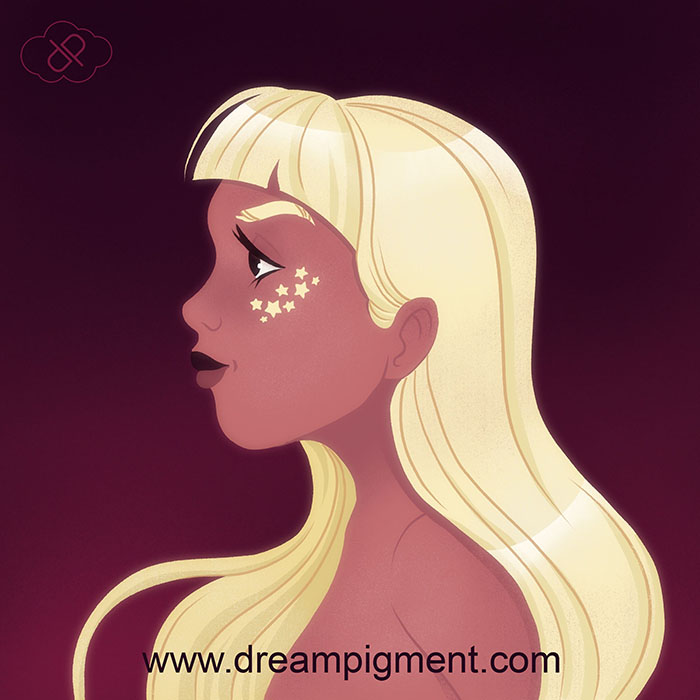
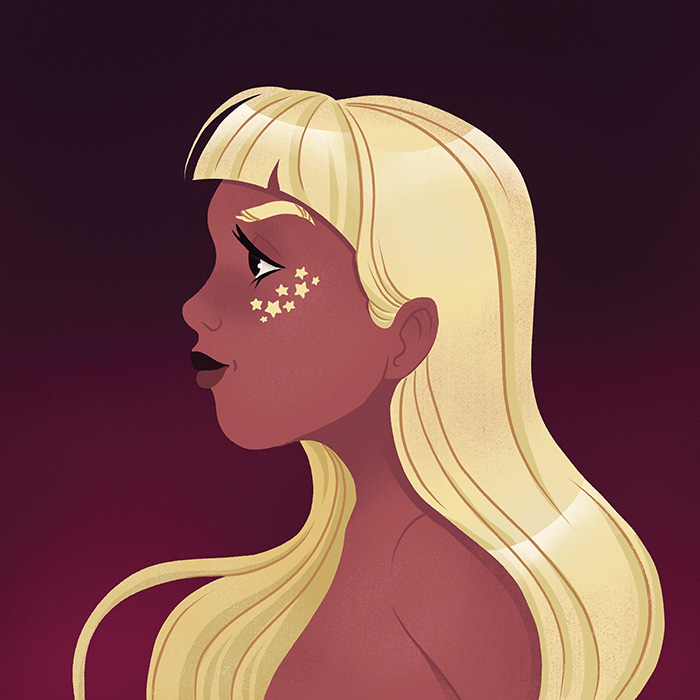
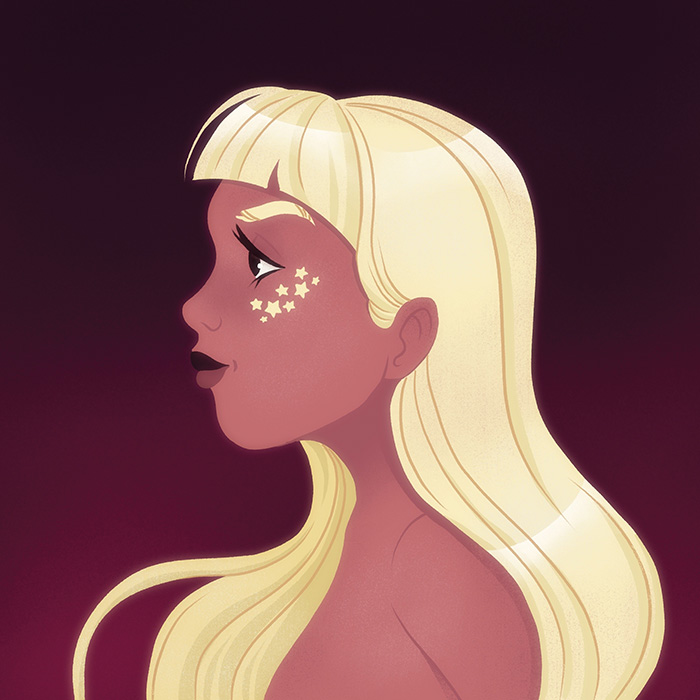
Coloring complete!
And if you feel fancy—you can add a little glow effect. I'll show you how in another tutorial.
I hope these techniques help you color your artwork in the Procreate app! Don’t be afraid to experiment! If you liked this tutorial and would like to see more. Please show your support by following me on social media. You can also show your support with a small donation to my Ko-Fi page. For questions or comments, use my contact page. Until next time! Let’s draw!
